Showing posts with label crafting. Show all posts

Saturday, March 19, 2011

Knotted Headband


I found this headband on You Seriously Made That!? and loved it! I knew I had to try it. It's a super easy project for the beginner crocheter because you just make a chain and nothing more. I don't think I could explain it half as well as Cami can so if you want the tutorial HERE it is.

Supplies:
Yarn
Size H Crochet Needle
8 inches of ribbon
2-6 inches of elastic

Difficulty: Easy (if you crochet)
Time: 30 minutes
Cost: under $2-$5 (depending if you have yarn)

I loved the original but I had to make some changes. Instead of using ribbon to tie the headband on, I used elastic. Come on?! Who can actually tie on a headband and get it tight enough with out getting your own hair caught in it. I know I can't. Other than that, mine is the same. The hardest part for me was tightening the knot. Just take your time, follow the instructions, and you'll do fine.

Saturday, March 12, 2011

Etched Glass Wedding Present Tutorial


Yesterday my cousin got married and invited us to the Reception. Being the Crafty Kid that I am I wanted to do something special. Before we continue I need to tell you a little about myself. I dream big! I want to go all out and be fabulous. One example, for my sister's Bridal Shower I planned to make cake balls hand dipped in chocolate and decorated by hand. When I realized that wasn't going to happen, I wanted to make a sheet cake and on each piece have a handmade blue white chocolate heart. Walmart didn't have blue candy bits, so I ended up just using blue sparkle frosting to make the hearts on the cake.
With that said, I had grand plans for what I was going to make. I knew I wanted to etch a glass casserole dish (I'd seen it here and loved it!) and if I had the money I wanted to make the insulated carrying case for it (from the same site). When I went to Walmart, I found a great deal on a glass pan kit. It had a 9X13 pan, 8X8 pan, a pie plate, a bowl and measure cup. With all that I didn't think the hubby would OK a carrying case too but I could still etch it. It turned out great! I thought I would show how I did it and some of the things I learned while I was doing it.


Supplies:
Glass Pan, Dish, Cup, etc.
Armor Etch
Stencil
Paint Brush

Difficulty: Medium
Time: under an hour
Cost: $10 for etch (at Robert's Craft)
+ the cost of a pan


1. Clean your glass really well before you start. Then attach your stencil to the pan with tape or stencil glue. (Instead of Etching the letters, I was difficult and etched everything except the letters)


2. Using a paint brush glob on the etch in a thick layer (I didn't do mine thick enough so I had to do it twice). What about 5-10 minutes.


3.This is what it looks like after you wait. You can see that it wasn't thick enough. Really glob it on so all you see is white and not the glass underneath.


4. Once you wash it off, dry it and Ta-dah! A Personalized Wedding gift. I really wanted to write more but this pan has a beveled edge on the bottom so that limited my space.


This was really fun! I really don't have patience so these crafts that happen right before your eyes are perfect for me! I hope they like it!

Monday, March 7, 2011

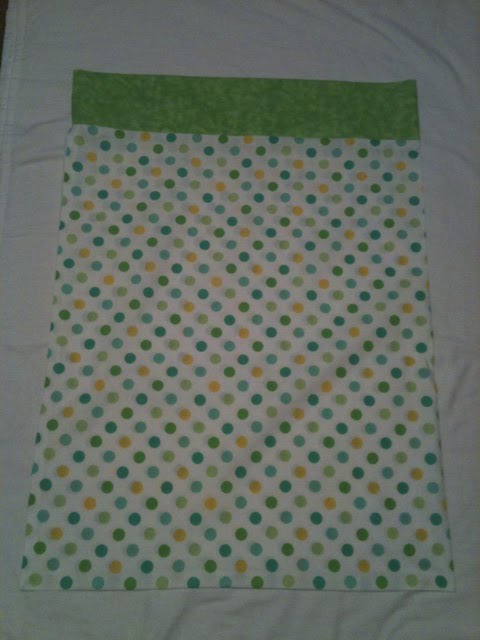
St. Patrick's Pillowcase

It's been a while since I've blogged and some of you might be wondering what I have been busy doing? Truth is...Nothing. I'm just a slacker, so I've decided to step it up and get crafting! I thought that for a fun tradition, that I'd make my son Holiday Pillowcases. For a couple weeks before and a couple weeks after a certain holiday, I'd let my son have these special handmade pillowcases. So here is my very first one!


St. Patrick's Pillowcase
Supplies needed:
3/4 Yard of Fabric
1/4 Yard of Accent Fabric

Time: 30 minutes
Difficulty: Easy
Cost: about $5

1. Fold accent fabric in half lengthwise with WRONG sides together (this way you wont have to hem it. I hate hemming!)


2. Sew the ends together to make a continuous piece.


3. Fold in half with the RIGHT sides together; Sew long side and 1 short side (this makes a bag)


4. Trim corners (to make nice sharp corners)


5. Turn larger fabric right side out and sew accent piece to it along the 1 open edge. (Sew the raw edge of the large piece to the sewed side of the accent piece)


6. Turn out the accent piece and press.


Presto! A cute pillowcase. You can buy special Holiday Fabrics at JoAnn's or another fabric store. I did like the 1 fabric that Walmart (I know, I know! Who buys fabrics at Walmart but I REALLY needed to craft and didn't want to drive) so I found this cute green and yellow fabric. If you have girls you can sew some lace between the 2 but I have a boy so No Lace for me! Enjoy and Happy St. Patrick's Day!

Friday, January 28, 2011

$5 Challenge

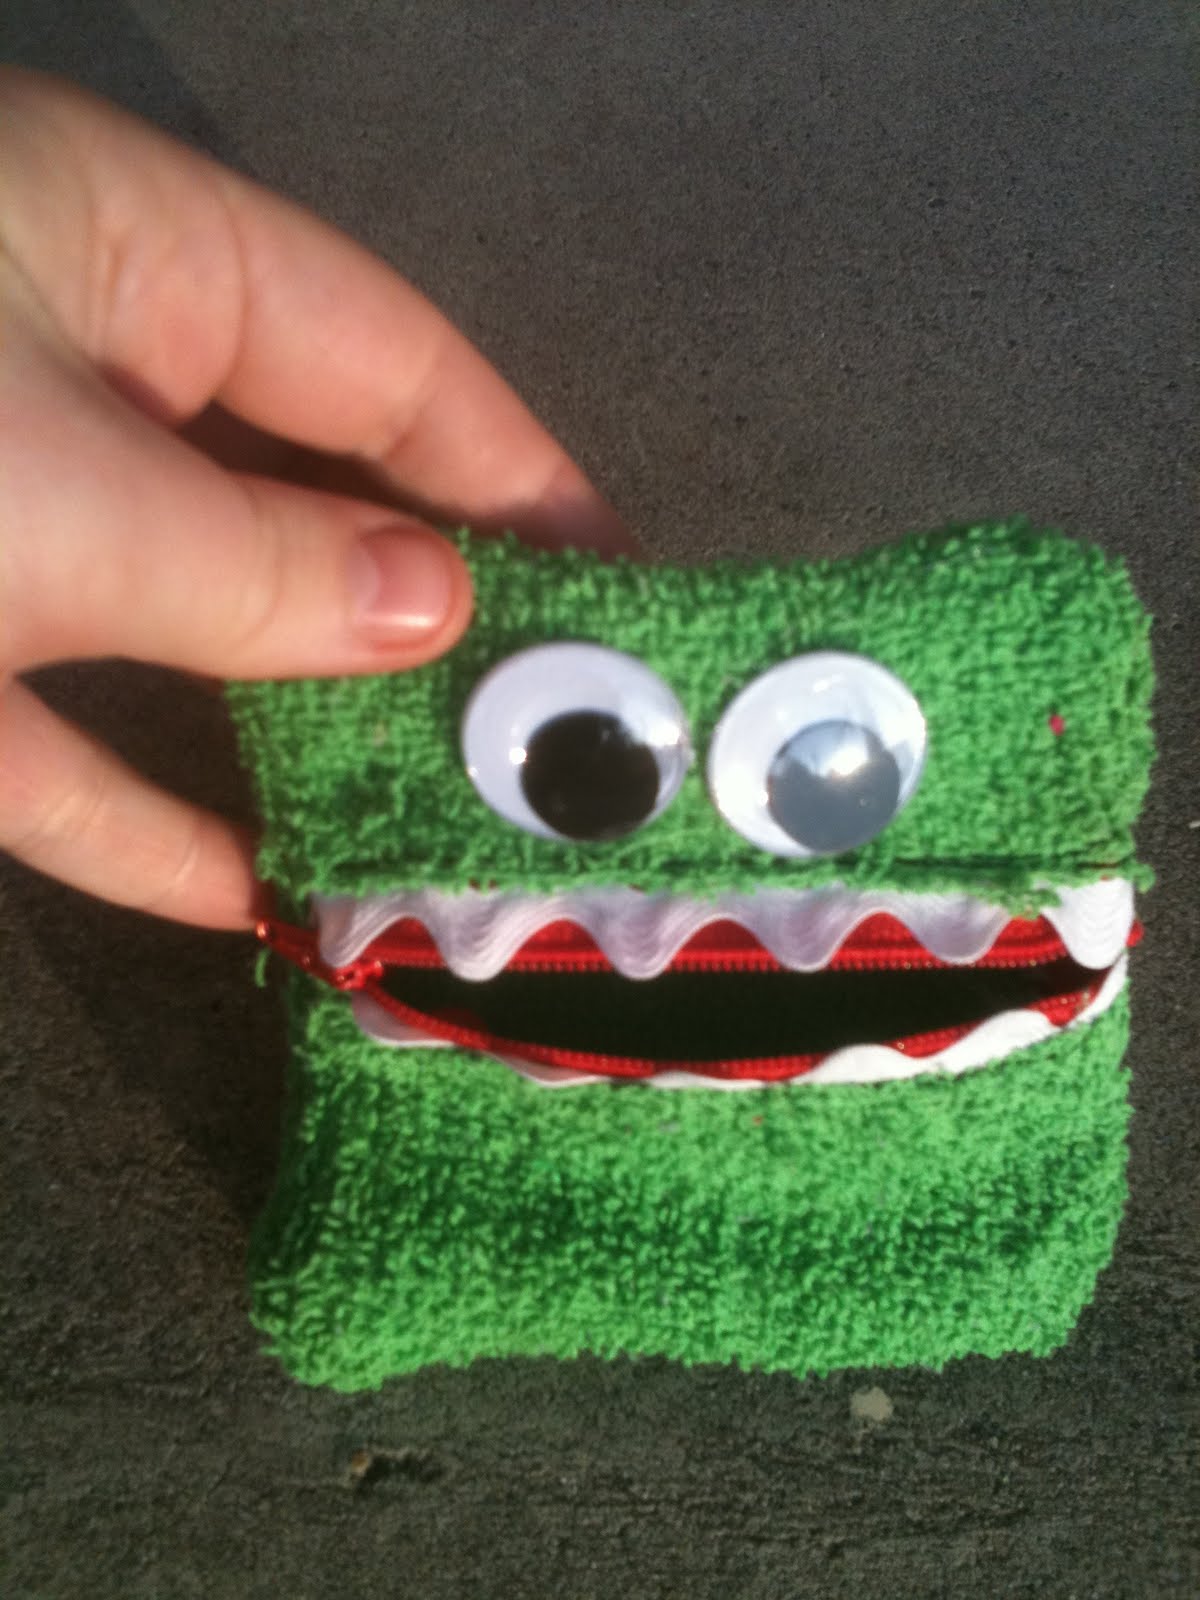
On KSL (channel 5 in my neck of the woods) they are having a $5 Challenge. You have to make something while only spending $5 AND you have to use 1 item that you already have. Tricky Tricky! The first time I heard this I knew I had to take a short, since Monday I've been searching the web for inspiration and spraining my brain for something creative I could make. Then I found it! Money Munching Monster Coin Purses. I found the idea at Create One Day. I loved the idea but I had to dress it up a bit AND use something that I already had. This is what I came up with:


I think he's really cute! I used a washcloth for the body, Rick Rack for the teeth, a Red zipper for the mouth, and big googly eyes! I really hope they pick me! If they do I win over $1,000 worth of crafting supplies including a new sewing machine, quilting lessons, and tons of scrapbook paper! If I'm a finalist everyone needs to vote for me!!! I can't wait to find out! Wish me luck!!!


Posted by Picasa