Last week,
Studio 5 (a local craft, fashion, cooking, EVERYTHING show) had a $5 challenge (I've posted about it earlier,
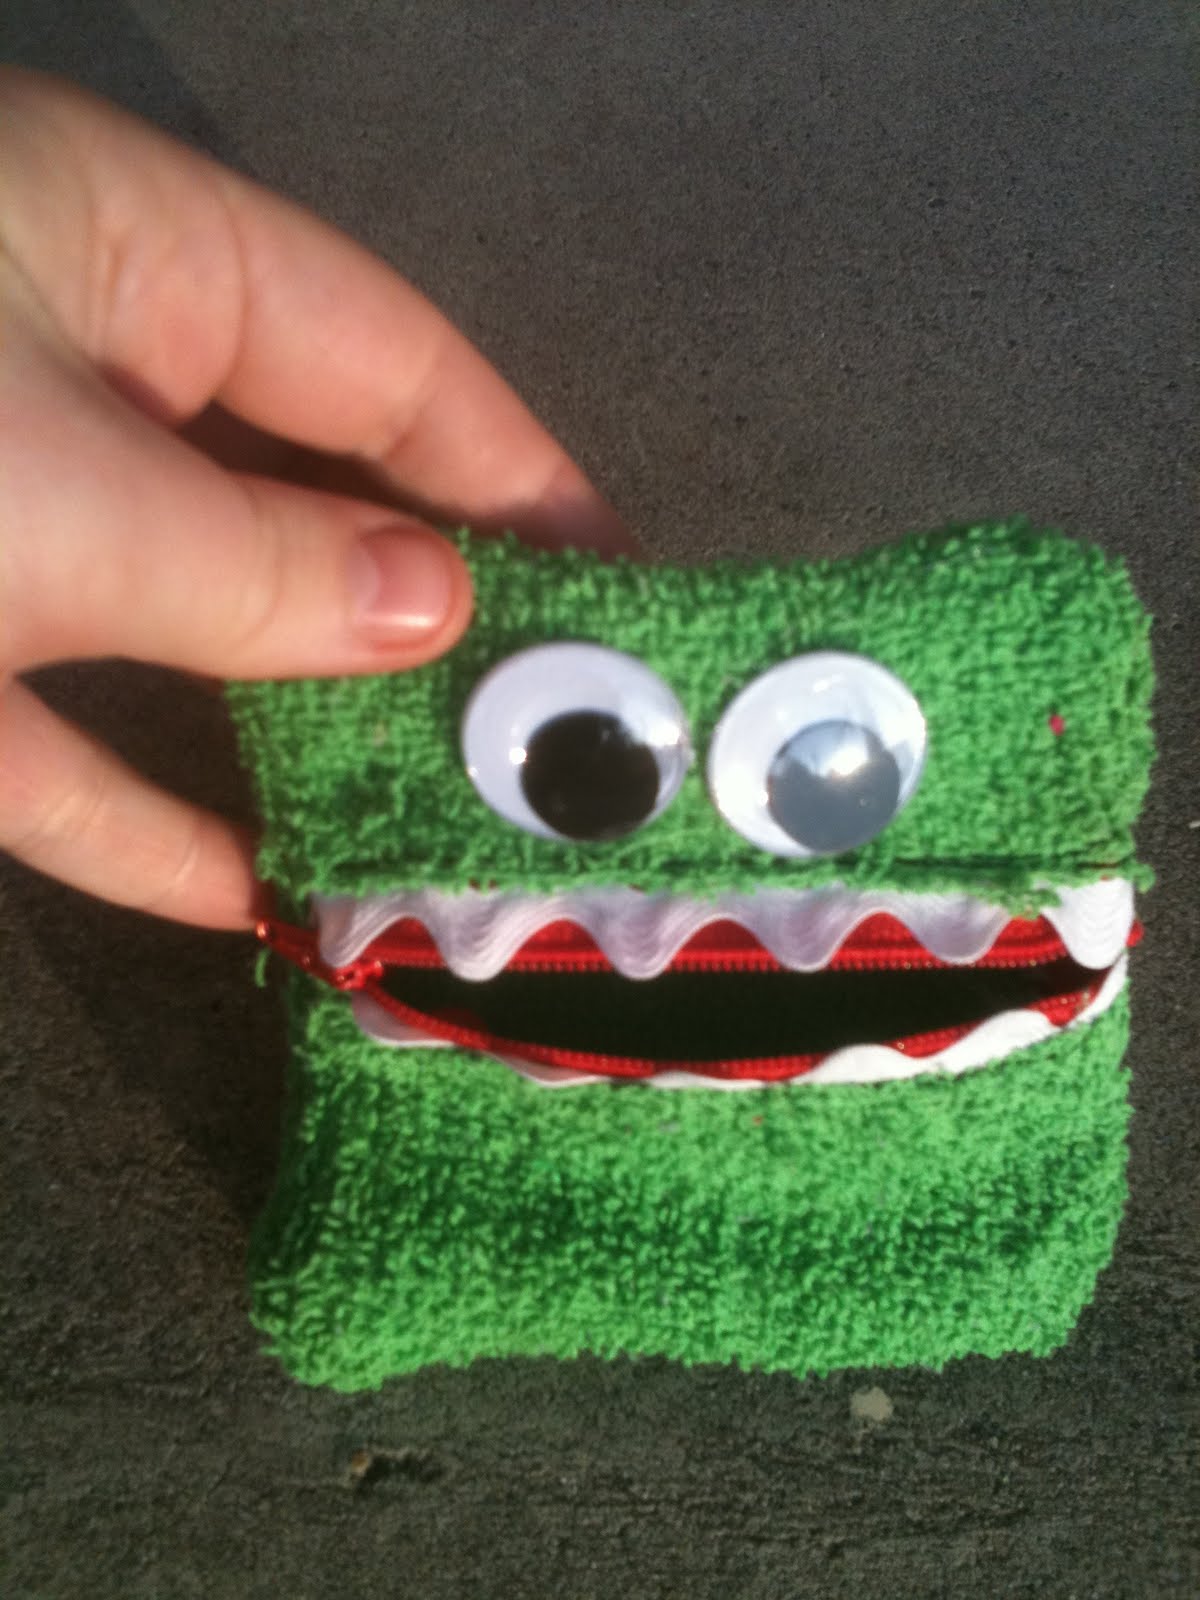
Here) and I knew I just had to enter. The rules were you had to make something using only $5 and you had to use 1 item that you already had on hand. I thought long and hard on it and decided that I was going to make something for all the boys out there. You always see "girl" crafts (bows, skirts, tuts, etc.) but being a mother of boy it's hard to find cute crafts for them so I search the web and found something that I could make but that I wanted to put the "Jessica" touch to. I made 2 of these with the allotted $5 and I only had an hour to go shopping, make it, write up my entry, and send it in (I wasn't procrastination, my hubby didn't get paid until that Friday and we only have 1 car so I had to wait for him to get home before I could go shopping). Needless to say, it's a really simple craft, especially if you are a sewer. Just a side note, I took these pictures in a hurry so I could write up this tutorial so if the pictures are a little blurry, I'm sorry!
Things needed:
1 colorful
Washcloth (on hand) (if you don't have any, Walmart has then in a 10 pack for $4)
1 red
Zipper (mine was 7 inches)
12 inches of White
Rick RackLarge
Googly eyes1. Start by cutting off the finished edge of your
washcloth and cutting it in half (mine where square so it didn't matter which Half I cut it).

2. Take one half and cut it into half again. You'll have 2 squares (I can't cut straight so mine weren't perfect but you can fix it when you sew the side together. P.S. I know, My towel is stain. I used the cleanest one for the actual contest. Sorry!)

3. Cut one of the squares in half horizontally (this is for the mouth).

4. Cut your
Rick Rack in half (6 inches) so that you have 2 pieces.

5. Open your
zipper (NOTE: if your zipper is bigger than your project, it's ok. You just have to sew over it a bunch of times when you sew the sides), place the rick rack between the zipper and the towel and sew. Make sure the rick rack is sticking out enough so it looks like teeth.

6. Close the zipper and repeat step 5. Take time to line up the rick rack so they fit like teeth. They don't have to be perfect but the closer the better.

7. Take your other full square and put right on top the "face" square. With right sides together sew around the edges, if your zipper is bigger than your washcloth make sure to go over it a few times.

8. Turn out (this was the hardest part for me, try to sew it with your zipper slightly open and you might not have the problem that I did.) My
googly eyes were glue on so I just hot glued them on.

And that's it! It's super easy and really cute! I'm so glad that people actually liked my craft. Thanks everyone, you've made my day!


 8. Turn out (this was the hardest part for me, try to sew it with your zipper slightly open and you might not have the problem that I did.) My googly eyes were glue on so I just hot glued them on.